Getting Started
1. Sign in and select a company
After signing in via Keycloak (Single Sign-On), the company selection is displayed. Pick the company you are onboarding sites for. You are redirected to the project overview automatically.
You can switch companies at any time via the “Switch company” button in the top right.
2. Project overview
The project overview shows all existing migration projects of the selected company as cards. Each card shows the project name, number of sites, and a progress ring.
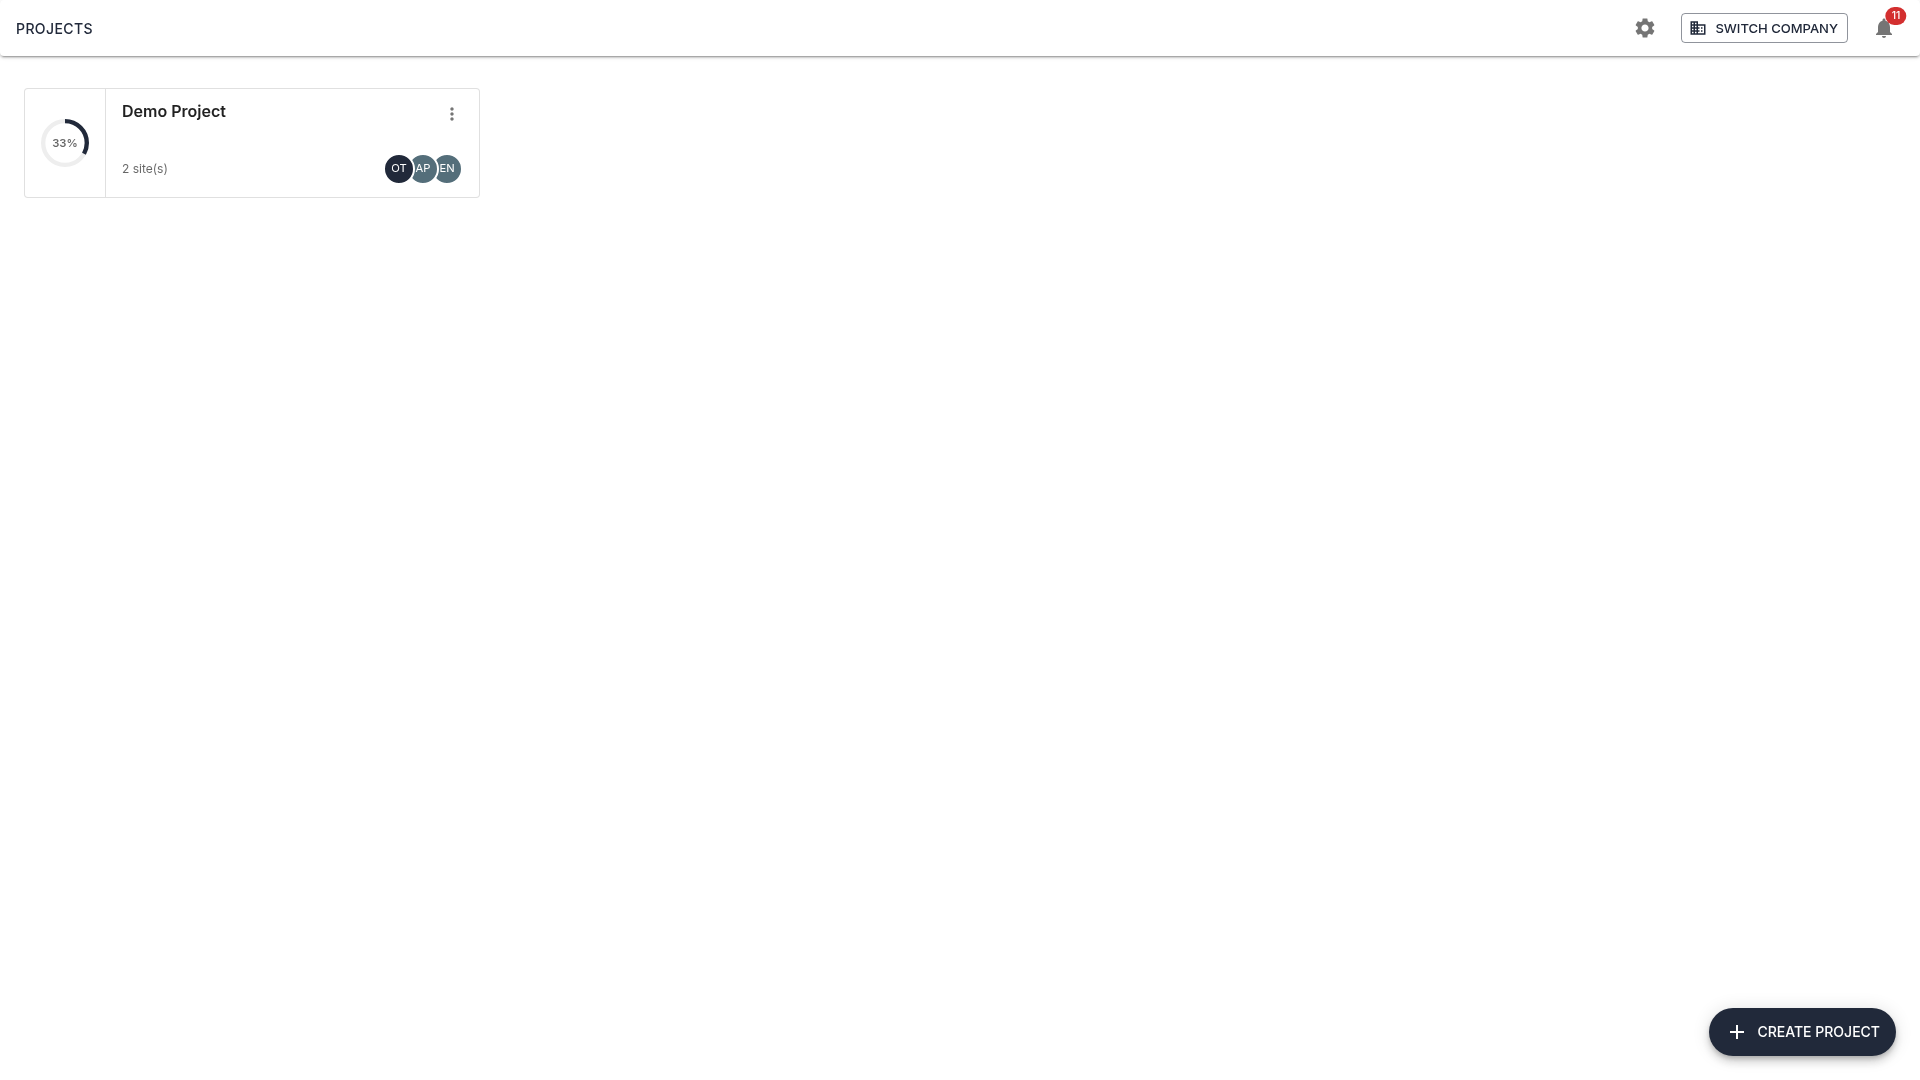
Use the three-dot menu on each card to rename or delete projects. There you can also assign an Owner and any number of Participants — these are used for task assignment and notifications across all sites in the project.
Notifications
The bell icon in the top bar shows the unread count. Clicking it opens the latest notifications, filterable by scope (Company, Project, Site). The link “All notifications” opens the Notification Center with full filtering and bulk actions.
3. Create a new project
Note: Creating projects is limited to Amperecloud employees. External users see a hint message instead.
Click “Create project” in the bottom right. A dialog opens:
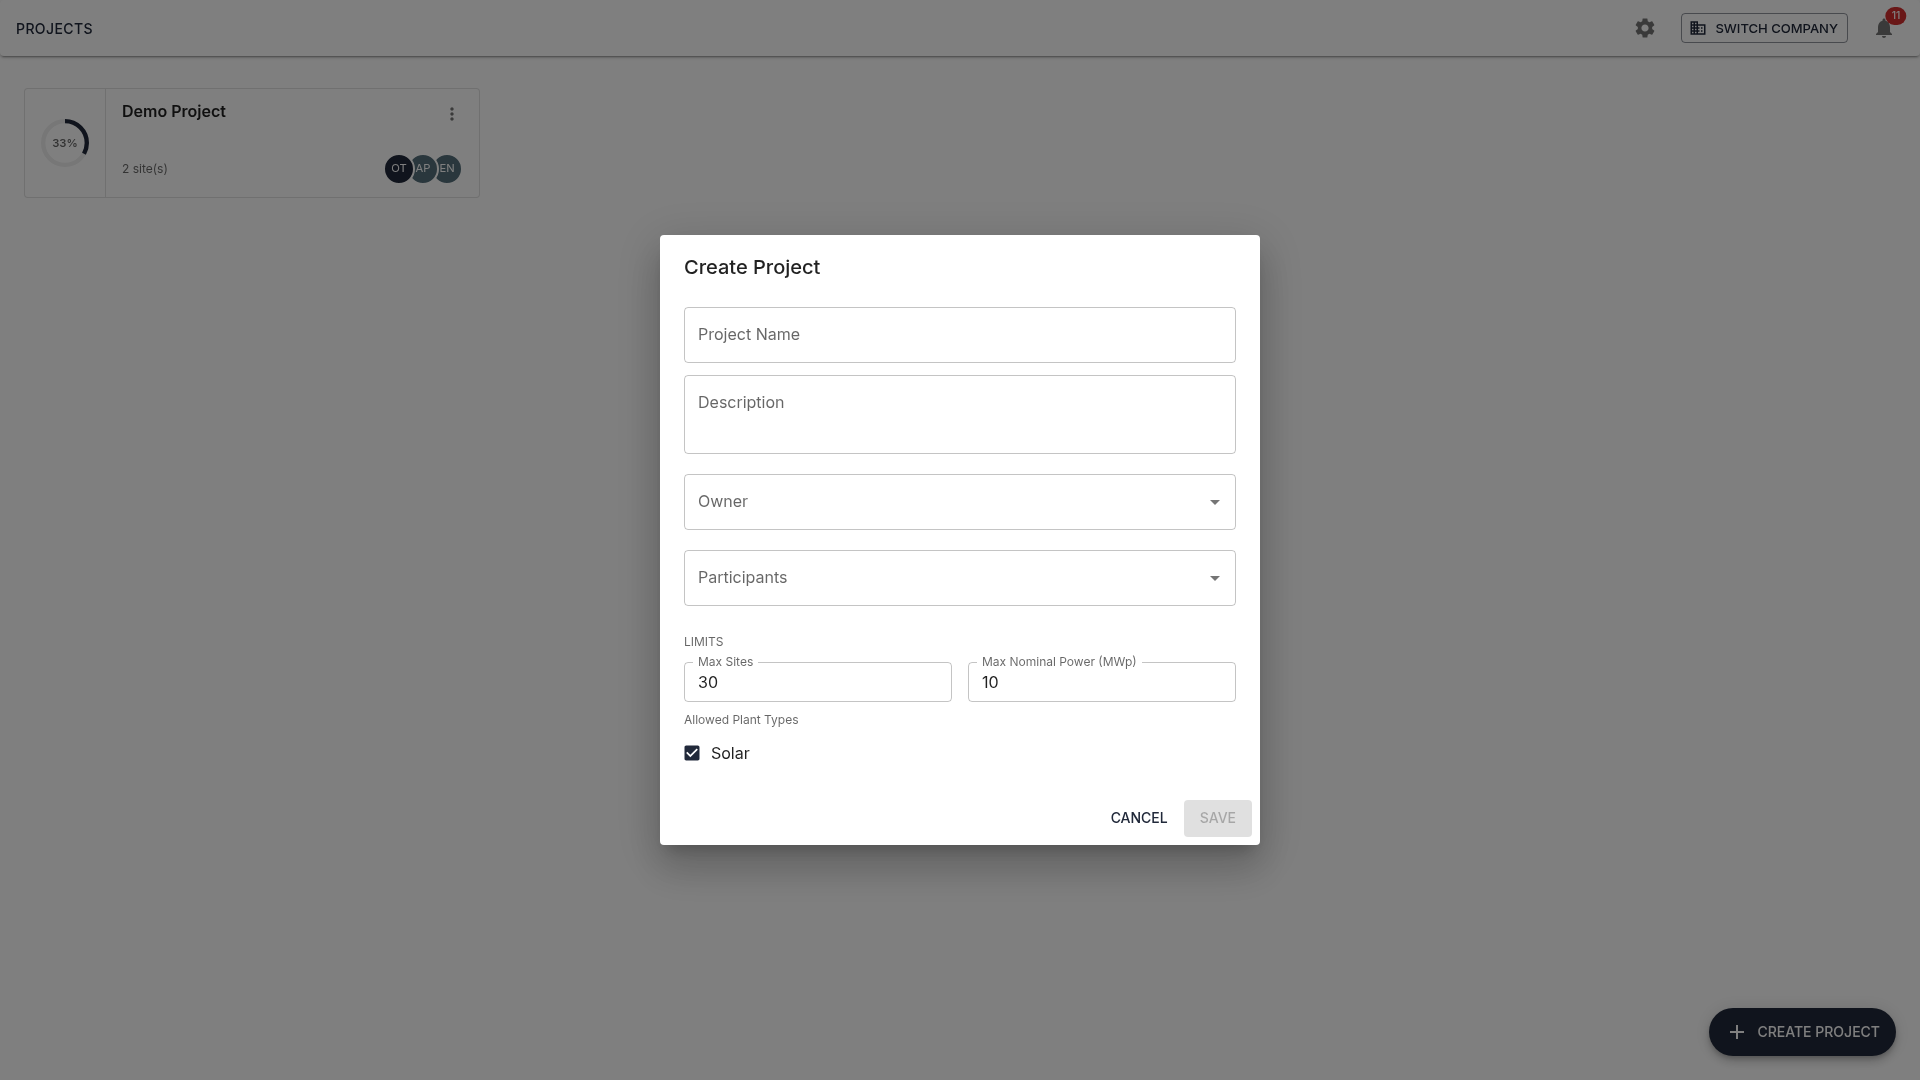
- Project name (required)
- Description: optional
- Owner: responsible admin
- Participants: optional co-maintainers
Project limits
When a project is created, limits are defined that constrain its scope:
- Max. number of sites
- Max. nominal power (MWp)
- Allowed plant types (e.g. Solar)
These limits are shown as progress bars in the site overview and validated whenever sites are added.
Click “Save” and the new project appears in the overview.
4. Site overview
Click a project card to open the site overview. The table shows all sites with number, name, nominal power, city, progress (5 migration stages as colored dots), plant type, and owner.
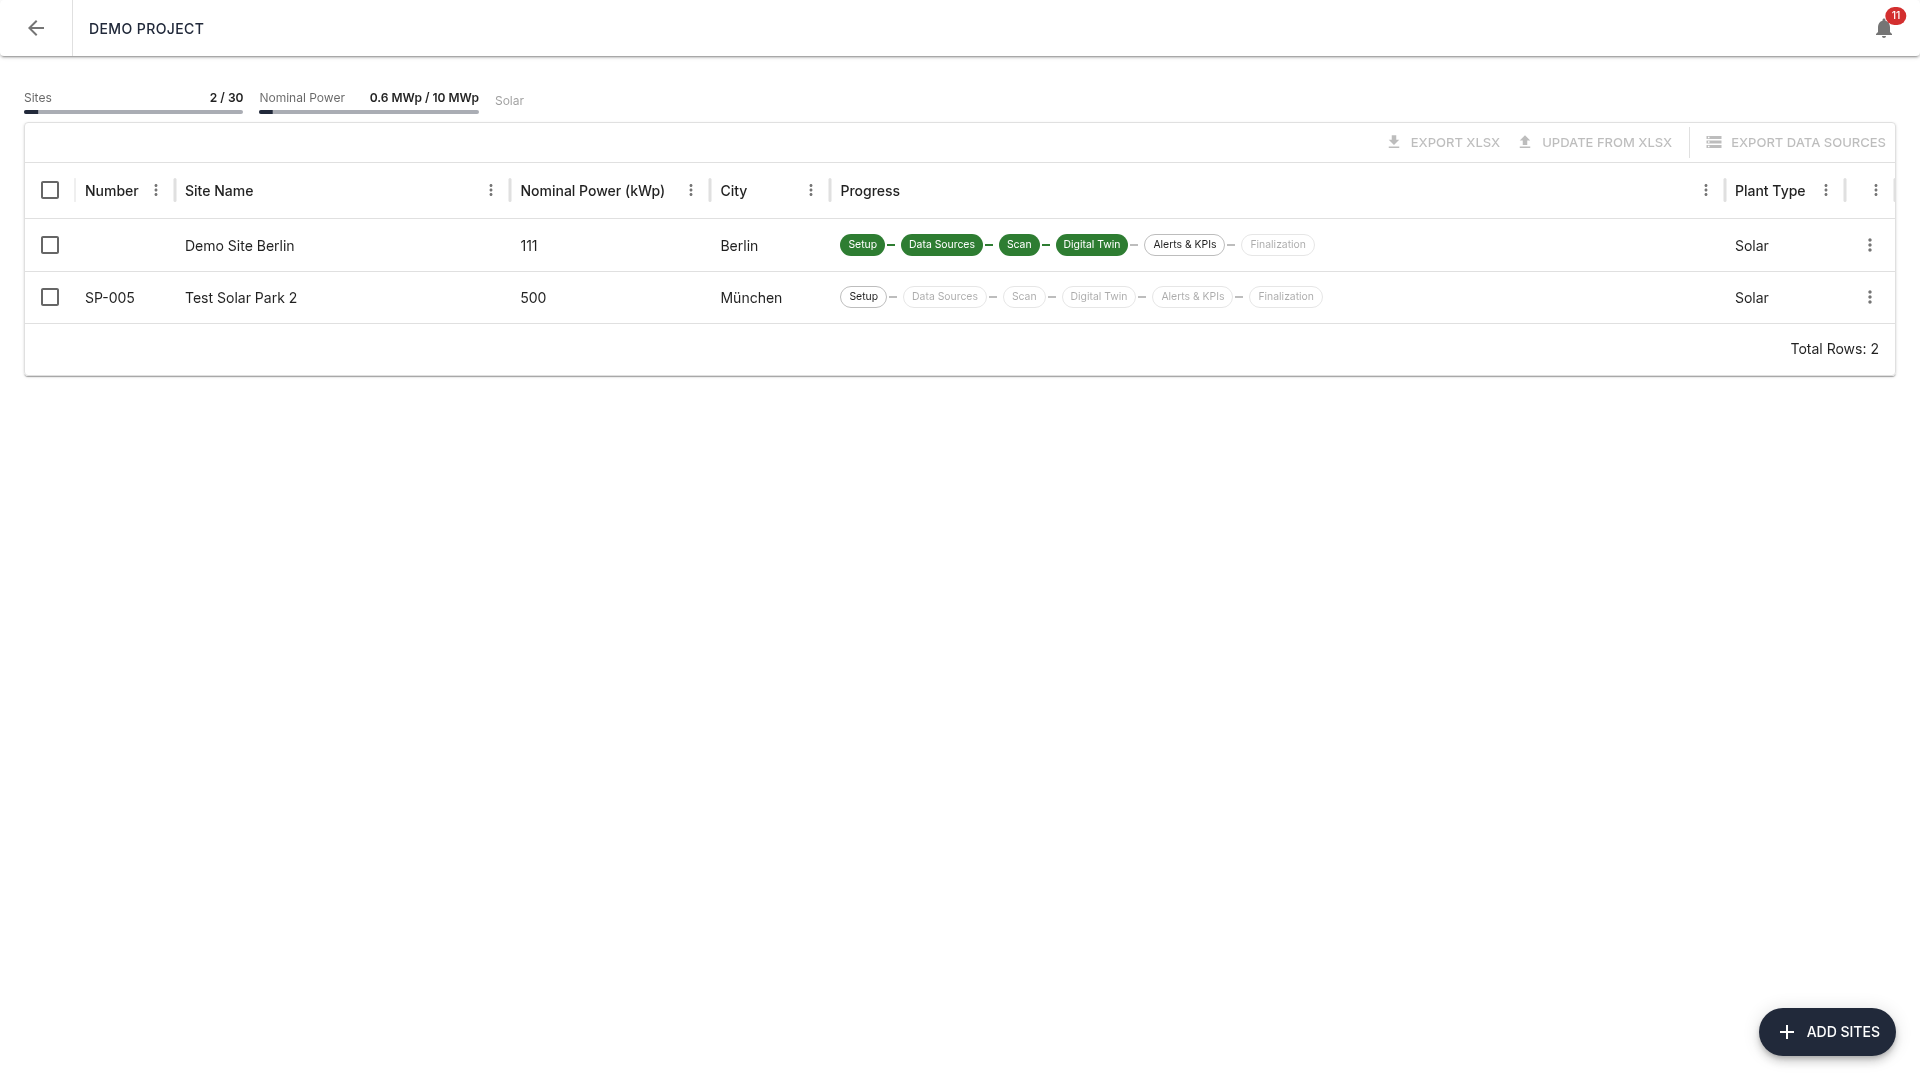
The colored dots show the status of each stage: green = done, orange = in progress, grey = not yet started. Clicking a dot navigates directly into that stage.
Two progress bars above the table visualize the current utilization of the project limits (sites X/Y and nominal power X/Y MWp). As utilization approaches the limit, the bars change color.
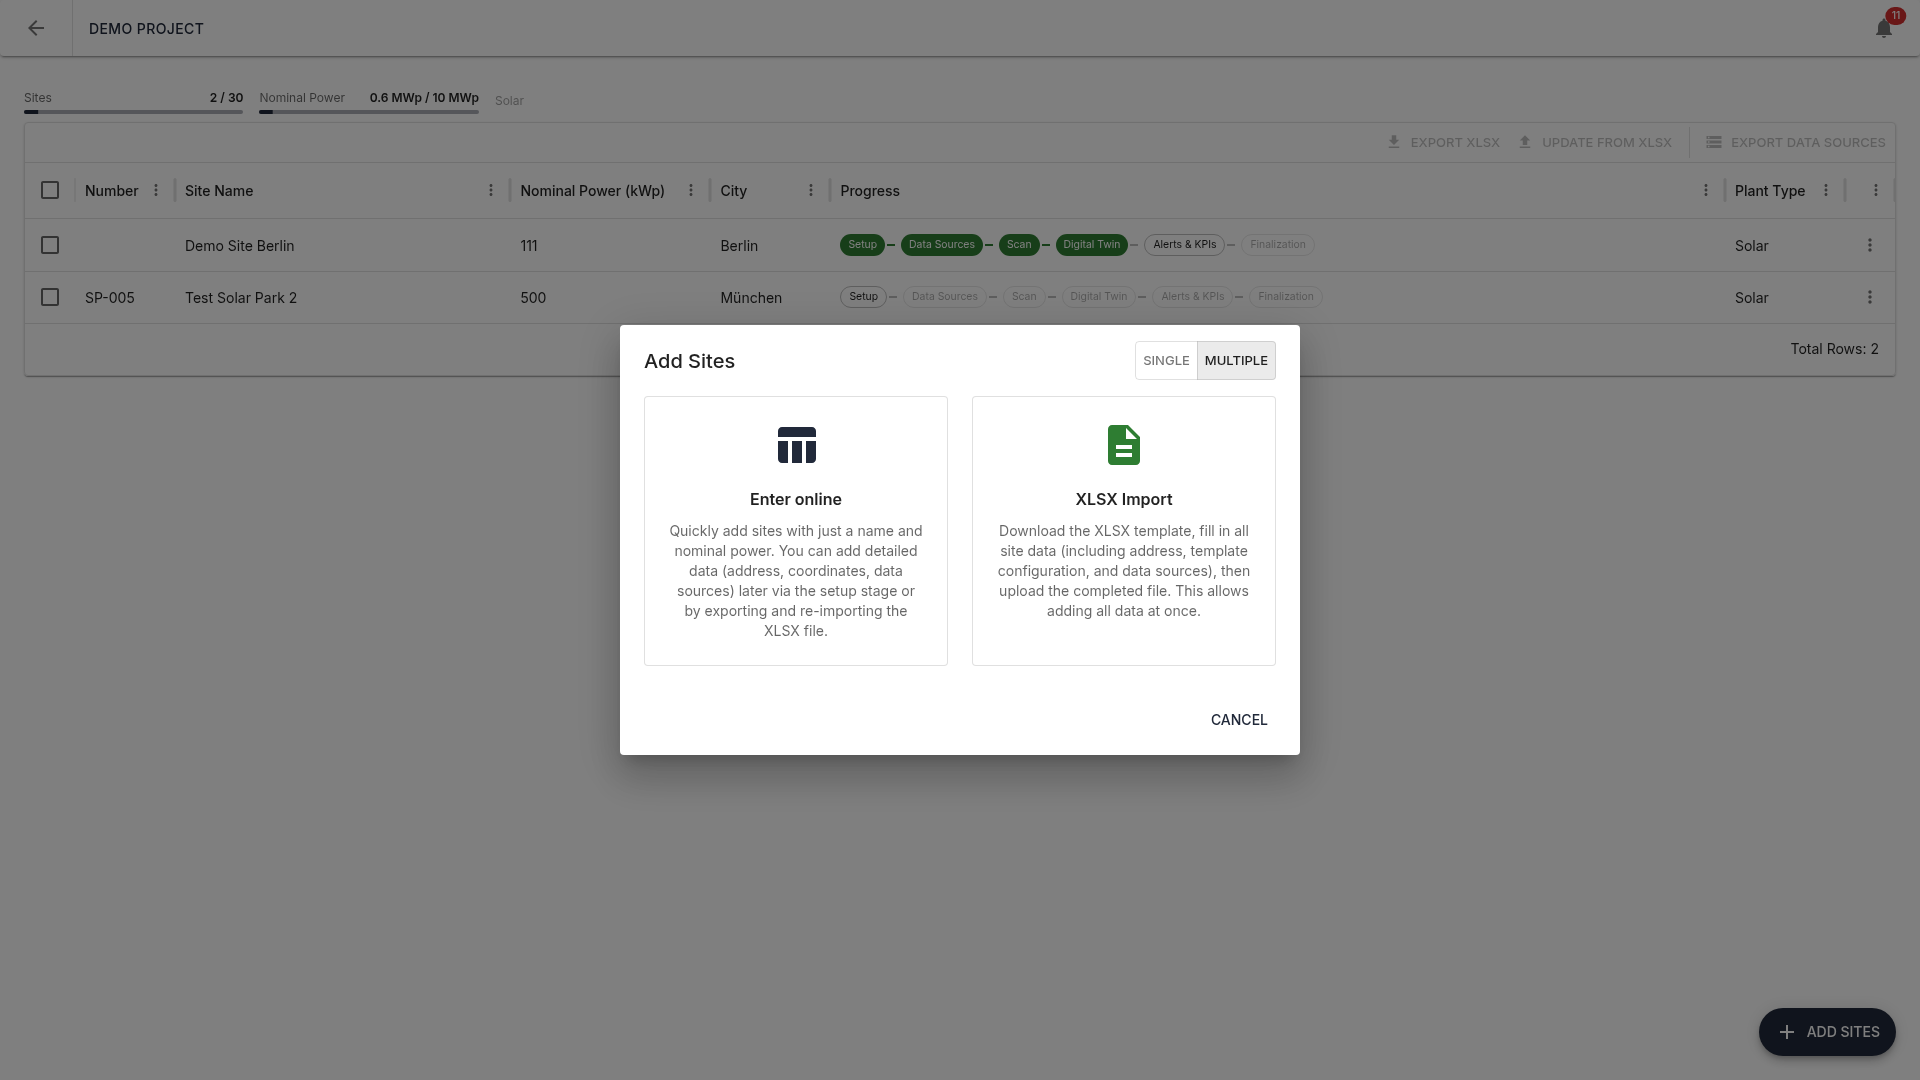
5. Adding sites
Click “Add sites” to open a dialog with three modes: Single, Inline table, and Excel import.
5a. Single site
Create a single site with full details:
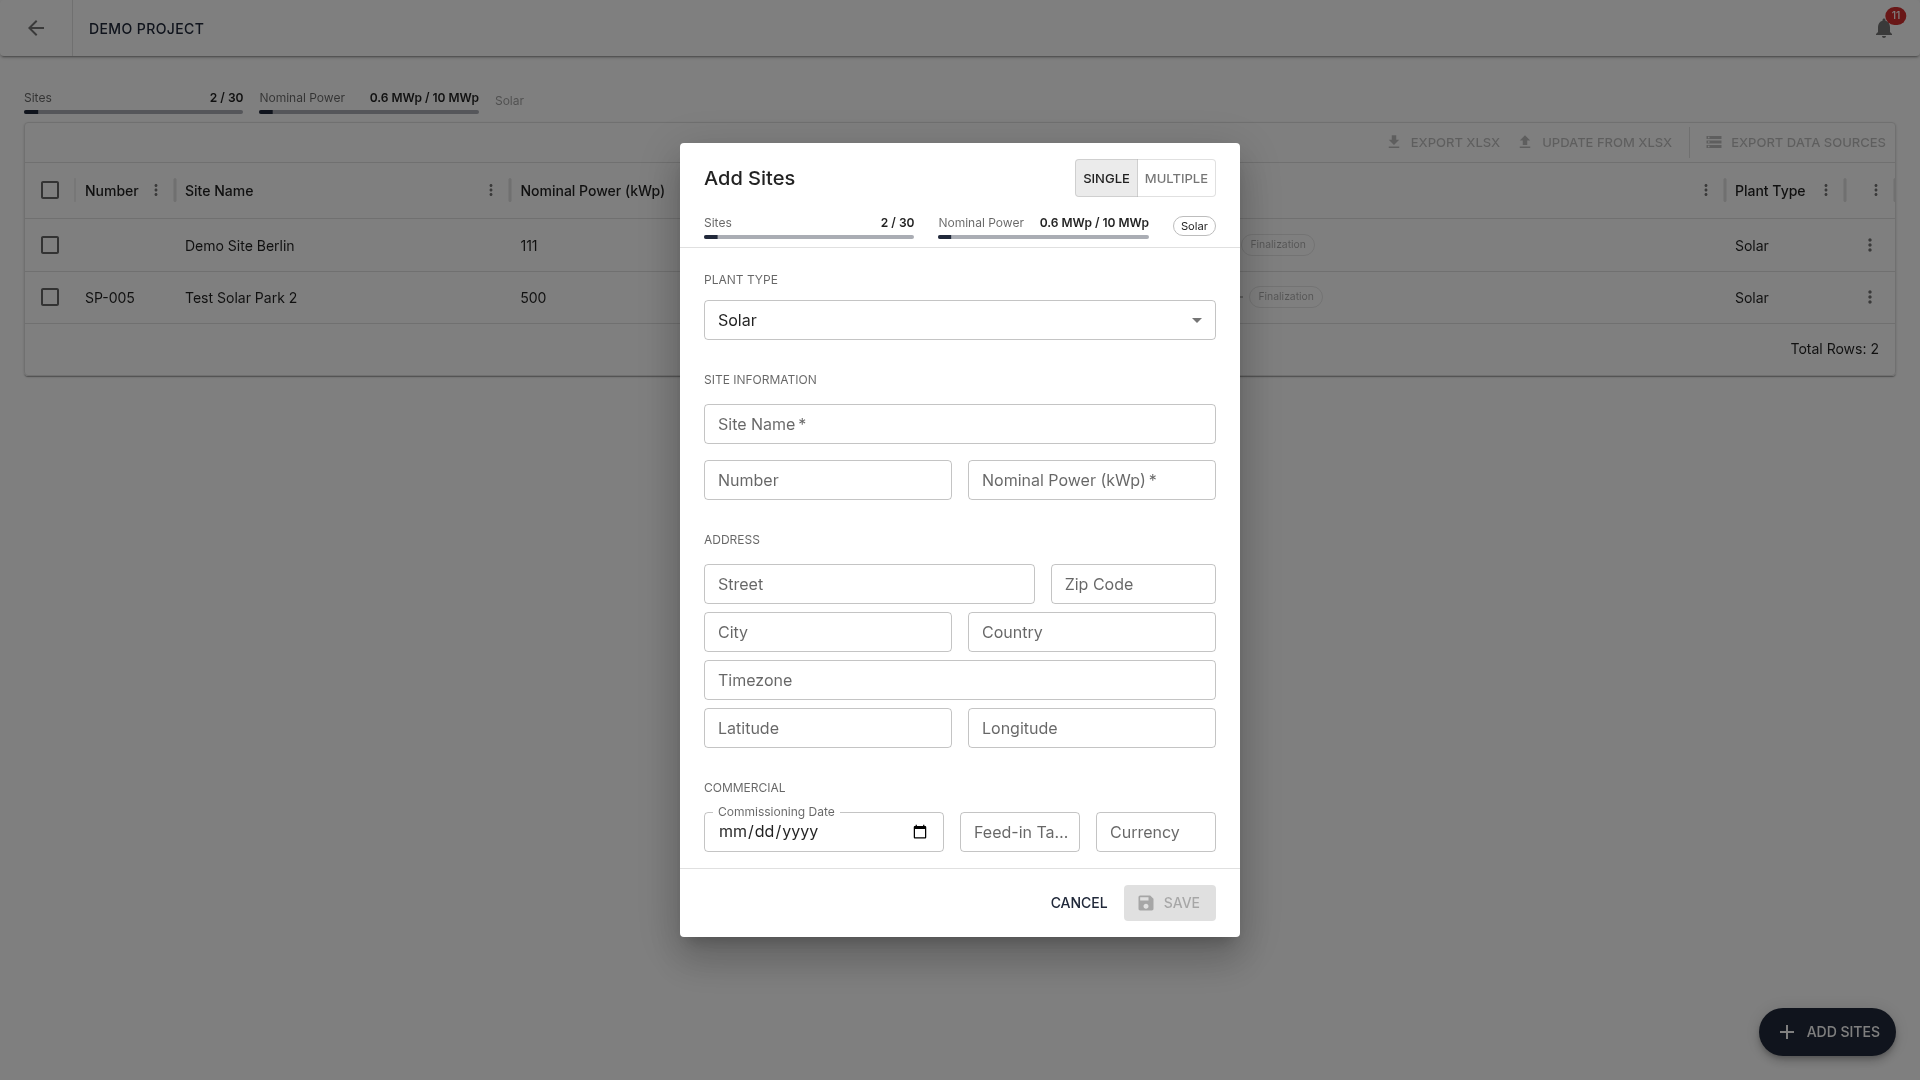
- Plant type (required)
- Number: optional, for sorting
- Site name (required)
- Nominal power (kWp) (required)
- Address: street, postcode, city, country
- Timezone: IANA format,
e.g.
Europe/Berlin - GPS: latitude and longitude
- Commercial: commissioning date, feed-in tariff, currency
5b. Multiple sites via inline table
Use “Inline table” mode to create many sites at once — perfect for pasting from Excel.
Paste from Excel
- In Excel, prepare columns: Number, Name, Nominal Power (tab-separated)
- Select and copy (Ctrl+C)
- Click into the first cell of the Name column
- Press Ctrl+V — data is spread across rows and columns automatically
5c. Excel import
“Excel import” mode lets you import sites with full details (including data sources) from a structured Excel file. The template ships with dropdowns, tooltips, and plant-type-specific columns. Data sources are created automatically on import.
Limit validation
Before saving, the system checks that project limits are not exceeded. If they are, an error message with the exact reason is shown.
6. Export and update sites
The action bar in the site overview provides Excel-based bulk operations:
- Export sites: Download selected sites as Excel, edit, and re-upload — only actual changes are applied, locked stages are protected
- Export credentials: Download FTP/SFTP/Email credentials of selected sites as Excel (one sheet per connection type)
Next steps
Once sites are created, onboarding begins. Each site passes through 6 migration stages:
- Setup — Complete general site data (→ 02-Setup)
- Data Sources — Configure FTP/SFTP/Email endpoints (→ 03-Data-Sources)
- Scan — Analyze raw data traces and create mapping rules (→ 04-Scan)
- Digital Twin — Refine the device structure and sync to platform (→ 05-Digital-Twin)
- Alerts & KPIs — Configure reading sources, KPIs, alerts, and satellite data (→ 06-Alerts-KPIs)
- Finalization — Final review of the entire onboarding and handover to the customer for production
Click a site in the overview to start with the first stage.